Use cdk8s to Define your Kubernetes Manifest with TypeScript
cdk8s is a command-line tool that enables you to create a Kubernetes manifest using a general purpose programming language. In this post, we'll use cdk8s to deploy the nginx web server to DigitalOcean Kubernetes.

Sam Magura

A Kubernetes manifest is a YAML file that describes the services, deployments, containers, and other resources that make up your Kubernetes cluster. Defining your Kubernetes infrastructure by writing the manifest YAML manually is fine, but it can be slow to learn since, (A) configuring Kubernetes is very complex and (B) your editor won't provide any meaningful type-checking or Intellisense when editing YAML files.
Enter cdk8s , the Cloud Development Kit for Kubernetes. cdk8s addresses the pains of "YAML programming" by allowing you to define your Kubernetes resources in the general purpose programming language of your choice. cdk8s currently supports JavaScript, TypeScript, Python, Java, and Go.
While cdk8s is not directly related to the AWS Cloud Development Kit , it clearly takes inspiration from it. If you are familiar with how constructs work in the AWS CDK, you will feel right at home with cdk8s.
One thing to be aware of before choosing cdk8s is that it is purely a tool for creating Kubernetes manifests, meaning that cdk8s isn't involved at all in deploying your manifest to the Kubernetes cluster.
Secure your secrets conveniently
Zero is a modern secrets manager built with usability at its core. Reliable and secure, it saves time and effort.

What We're Building
In this article, we'll walk through deploying an nginx web server to DigitalOcean Kubernetes . We will use cdk8s to synthesize the Kubernetes manifest and then apply the manifest by running kubectl in a GitHub Actions workflow. The DigitalOcean access token will be stored securely in Zero and fetched at deployment time using the official Zero GitHub Action .
🔗 The full code for this example is available in the zerosecrets/examples GitHub repository.
Creating the DigitalOcean Kubernetes Cluster
Creating a Kubernetes cluster on DigitalOcean is extremely straightforward. Simply log in to your account, select "Kubernetes" in the menu on the left, and click "Create cluster". You can leave all options at the default values, except for the node plan and node count. For these settings, I recommend selecting the cheapest option to save money. Currently, this means the $12 per month node plan and 1 node. Submit the form and DigitalOcean will begin provisioning your cluster.
While you're waiting, install kubectl and doctl which you will need to deploy to the cluster from your local machine.
After installing both, create a new DigitalOcean personal access token by clicking the "API" link at the bottom of the main DigitalOcean navigation. For now, place the access token in a secure location on your computer — we'll move this secret to Zero at a later point. Then run
and paste in the access token. Once that is done, authorize doctl to connect to your cluster by running
This command will update your kubeconfig file , which is located at ~/.kube/config.
The cluster ID is a UUID that you can copy from the cluster's page in the DigitalOcean portal. To test that the connection to the cluster is working, you can run kubectl cluster-info:
Bootstrapping the cdk8s Project
Now let's install cdk8s and use it to create our Kubernetes manifest by writing TypeScript code. The main way to use cdk8s is the CLI — you can find the instructions for installing it on the Getting Started page.
Now, make a new directory and run cdk8s init to set up a new project from a template:
This will create a package.json and a main.ts entrypoint, among other files. main.ts is where we'll write our "constructs", which is a generic cdk8s term that encompassasses things like Kubernetes services and deployments.
The cdk8s Getting Started guide shows the code to deploy a "Hello world" Docker image to your cluster. We only need to tweak this code slightly to make it deploy the nginx image instead.
Here's the code you should place inside the constructor of MyChart:
This is the same as the code from the cdk8s docs, with two changes:
- The
imagekey was changed frompaulbouwer/hello-kubernetes:1.7tonginx. It's OK to omit the tag sincelatestwill work for our purposes. - The nginx container listens on port 80, so the
targetPortandcontainerPortwere both changed from 8080 to 80.
When the code is in place, run
to synthesize the TypeScript code into a YAML Kubernetes manifest. If you open the generated manifest (at the path dist/nginx-project.k8s.yaml), you'll see a YAML file that is very similar to the TypeScript code we wrote:
Deploying from Local Development
To deploy the Kubernetes manifest to the cluster running in DigitalOcean, run
I recommend adding this command as a script in your package.json to save yourself some typing.
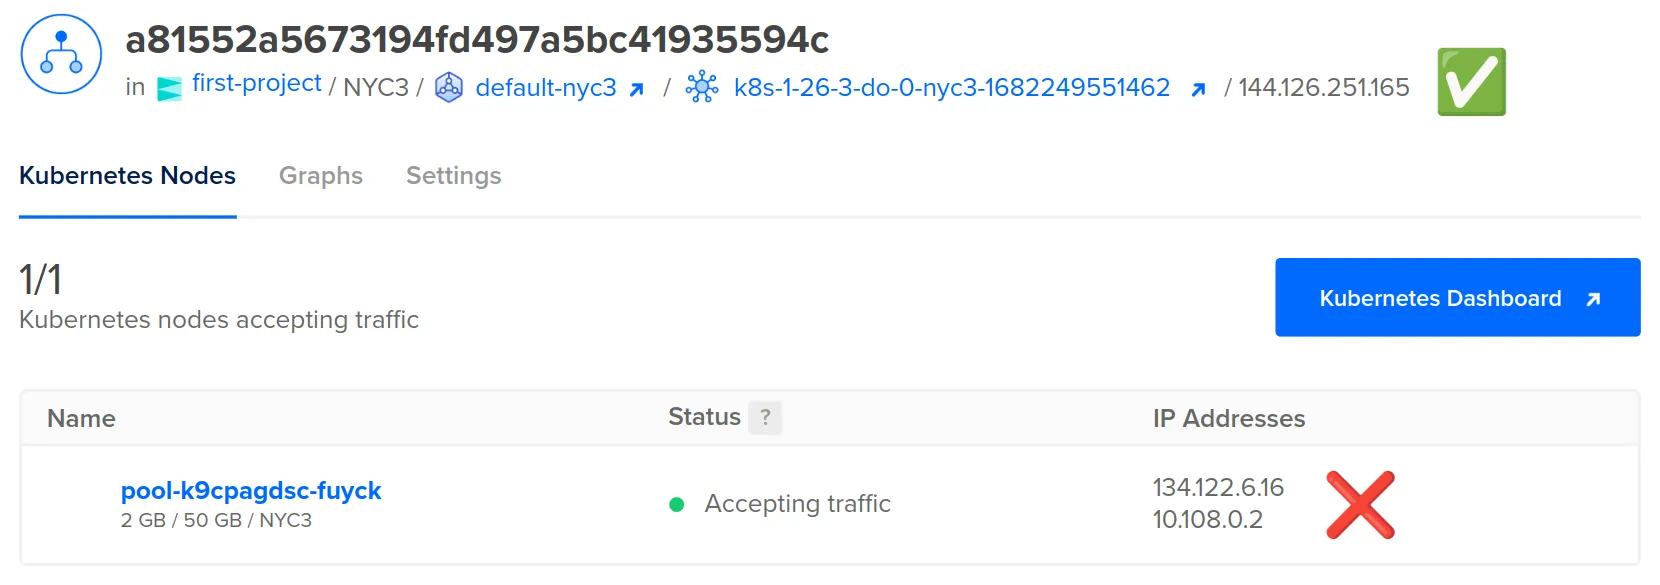
The first time you run the deployment, it will provision a DigitalOcean load balancer which takes a few minutes. You can monitor the status of this in the DigitalOcean portal. Once the load balancer is up, copy its public IP. Make sure to copy the IP of the load balancer and not the private IP of the Kubernetes node, like I did the first time I tried this.

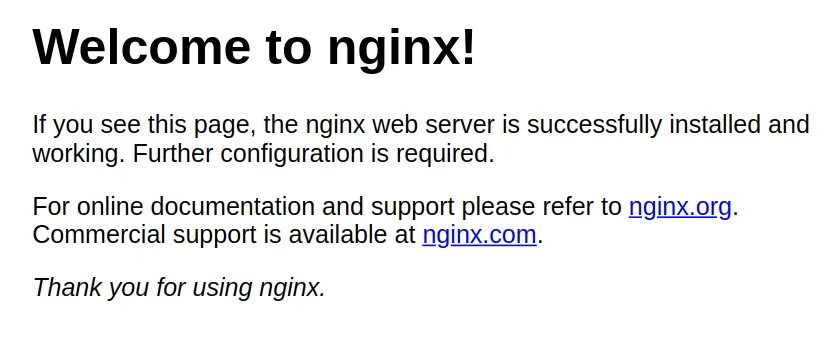
Now simply paste the load balancer IP into your browser's address bar. You should see the default nginx webpage!

If something didn't work, you can run kubectl describe pods to see the status of your pods.
Automating the Deployment with Zero
Ideally, both our application code and our infrastructure would be deployed from a CI/CD system. Let's automate the semi-manual process described above using GitHub Actions, so that the Kubernetes manifest is applied to the cluster each time a PR is merged into the main branch.
But first, let's move the DigitalOcean access token into Zero so that our workflow can retrieve the token from Zero when it runs. This is easiest step of the whole process!
To create a new Zero project and connect it to GitHub Actions:
- Log in to Zero and create a new project. Copy the Zero token to your clipboard.
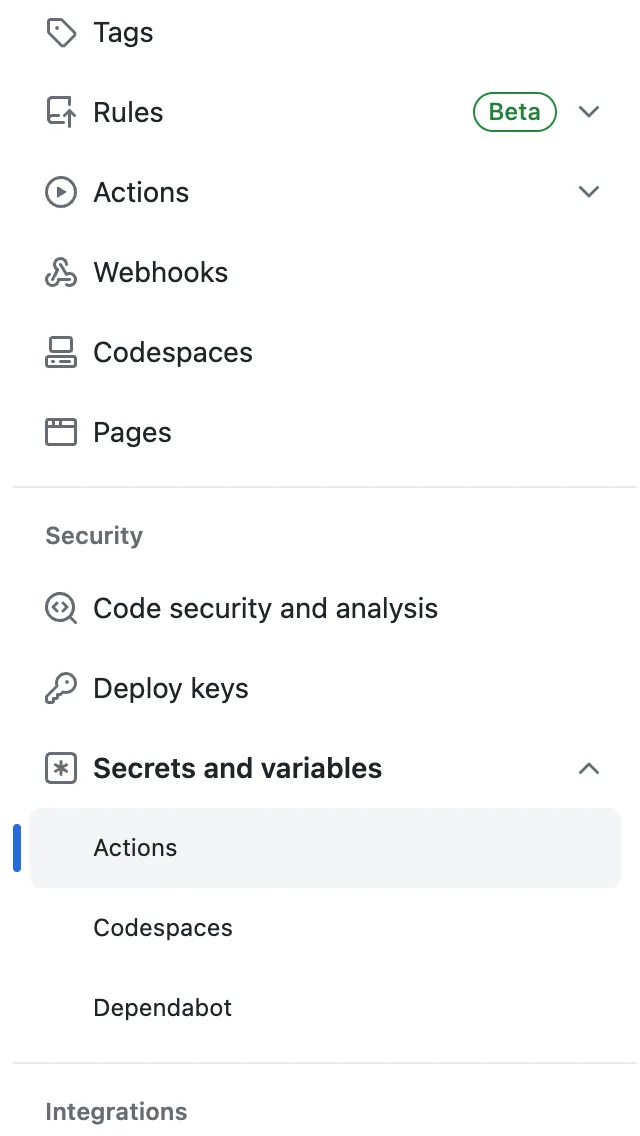
- Go to the settings page of your GitHub repository. Select "Secrets and variables > Actions" in the menu.
- Create a new repository secret named
ZERO_TOKENand paste in the Zero token.

Now, let's add the DigitalOcean personal access token to the Zero project:
- Return to Zero and click the "New secret" button.
- Select DigitalOcean for the secret type.
- Paste the DigitalOcean personal access token into the
TOKENfield.
Your access token is now stored securely in Zero!
Writing the GitHub Actions Workflow
To define your GitHub Actions workflow, create a file called .github/workflows/main.yml. Below are the key steps of the workflow. First, we use the Zero GitHub Action to exchange our Zero token for the DigitalOcean access token. This places the token in an environment variable which we then pass to the doctl setup action. Then, we run cdk8s to synthesize the Kubernetes manifest, and then apply it with kubectl.
Click here to view the full workflow file.
Cleaning Up
When you are done, navigate to the cluster in the DigitalOcean portal and click "Destroy".
Wrap-Up
This article demonstrated how to use cdk8s to define your Kubernetes manifest using TypeScript code, instead of writing the manifest YAML directly. The cdk8s approach is beneficial because:
- When using cdk8s, you piece together high-level building blocks and let the cdk8s CLI handle the low-level details, and
- Your editor can provide vastly better type-checking and Intellisense in TypeScript files than it can in YAML files.
Together, these two factors make Kubernetes development faster and easier to learn. Some teams even report that switching to cdk8s transformed their entire Kubernetes development workflow.
This walkthrough really just showed a proof of concept — the next step would be to deploy a more meaningful application to the Kubernetes cluster. If you are looking for a relatively simple way to expand on the above example, try configuring the nginx container to serve a static website, like a single-page React application. That said, Kubernetes is overkill for serving a static website — you'll get the most out of Kubernetes if you are building a complex distributed system.
Other articles

Deploying Azure Functions with Pulumi and Zero
In this post, we'll use Pulumi to define our application's Azure infrastructure using clean and declarative TypeScript code.

Gain Insight into your Users with Twilio Segment and Next.js
Zero brings the greatest value to your team once you integrate with multiple 3rd party APIs. This article adds Segment analytics to our previous DigitalOcean Kubernetes + GitHub Actions project, with both the Segment and DigitalOcean keys fetched using the Zero secrets manager.
Secure your secrets
Zero is a modern secrets manager built with usability at its core. Reliable and secure, it saves time and effort.